
Field Gear - Assembly and Use
The individual belt helps to support the buttpack and carries the E-tool & carrier, ammunition pouches, canteens & covers and first aid compass pouch. The belt is issued in medium and large sizes so that it can be adjusted to fit over all layers of outer clothing including the armoured fragmentation vest. If you bare chest measures less than 30 inches wear the medium size. If you measure 30 inches or more wear the large size. To fit the belt, unfasten the hook on each end of the belt from the center eyelet in which it is engaged. Shorten or lengthen the belt so that it fits around your waist just loose enough not to constrict your clothing.
The suspenders help to support the buttpack and equipment belt. Suspenders come in regular, long and extra-long size. If you are under 68 inches tall, without shoes, wear the regular size. If you are over 68 inches tall, without shoes, wear the long size. If you are tall or broad chested or you expect to wear your webbing over cold weather clothing and/or a fragmentation vest, wear the extra-long size. The shoulder pads should be centered on your shoulders to distribute the weight of the load evenly. The suspenders may be worn without the buttpack, so for this, attach the suspender straps directly to the belt. Adjust the straps so that the they place the belt evenly at your waist. To keep the load evenly on both shoulders, attach the rear suspender straps at even spaces from the center of the rear of the belt.

Lay the pack with the back facing up, the flap to the top, and the two slide keepers in an open position. Lay the belt out flat with the back facing up and the male belt buckle to your left. Locate the center of the belt, and insert the belt into the two open slide keepers so that the center of the belt matches the center of the pack. Close the two slide keepers, making sure that the tip of the sliding bar engages the hole in the bottom of the clip (Insert).

To avoid loosing equipment make sure all clips are attached properly.
Lay the suspenders out flat, above the pack, with the inside facing up and the back suspender straps to the bottom. Attach the back suspender straps to the pack by putting the hooks of these two straps into the center of the two webbed tabs of the pack. Attach the front suspender straps to the belt by first fastening to the belt fasteners. Fold the suspenders back on the pack so that they lay with the ouside of the suspenders facing up. Put the hook of the left front suspender strap into the top eyelet on the front of the belt, nearest the female belt fastener; put the hook of the right front suspenders into the top eyelet on the front of the belt, nearest the male belt fastner. The open part of each hook should be to the front of the belt and the loop to the side away from the center fasteners.


To prevent the equipment belt from "riding up" in front when the ammunition cases are empty or are partially filled, put the front suspender strap hooks in the top eyelets of the belt at the sides under your arms.
Unfasten the belt, put on the assembled equipment, and fasten the belt. Unfasten the buckles on the two front suspender straps. Center the shoulder pads of the suspenders outside shoulders, and adjust to the length of front suspender straps so that the belt is properly located on your waist. Fasten the buckles to hold the adjustment pressing each buckle firmly with the thumb to insure that it is fully closed.

Remove the assembled equipment and place it on a flat surface. Fasten the belt. Unfasten the buckles on the two back suspenders straps. Locate the center of each shoulder pad of the suspenders. Fold the shoulder pads over at the center. Adjust the length of each back suspender straps so that the fastener hangs evenly at the front and back. Fasten the strap buckless to hold the adjustment. Make certain the buckles are properly fastened by pulling slightly on the suspenders.

Attach the E-Tool carrier to the belt on the left aide by means of the two slide keepers at the back of the carrier. Do not attempt to insert the clips over two thicknesses of the equipment belt webbing because the clips were designed to fit over only one thickness of webbing. Attach the two canteens with covers to the belt on either side of the buttpack Alternatively you can attach the cover to the sides of the Buttpack (Insert).


Attach the case to the belt on both the left and right sides, next to the front suspender straps. Unfasten the buckle of the supporting straps of the cases. Attach the snap of the supporting strap of the cases to the metal loops located at the bottom edge of each of the shoulder pads. Make sure the straps are not twisted. Adjust the length of the supporting straps so that the cases do not hang down. Fasten the buckle on the supporting straps to hold the adjustment.

Attach the compass pouch to either the belt in the front on the right side next to the ammunition case or to the web keeper on top of the padded portion of the suspenders. Attach the bayonet scabbard into the eyelets of the belt next to the left ammunition case. Alternatively you can attach it to the eyelets on the buttpack (Insert)


When you acquire your rucksack it may be in its separate components. Putting it together for the first time can cause some headaches. This section helps you on your way by explaining how to assemble the different types of rucksacks you are likely to be using when doing re-enactment. It also suggests how to attach your extra equipment and pack your rucksack if you are going out on any missions.
Your lightweight rucksack and frame are made up of the following components:
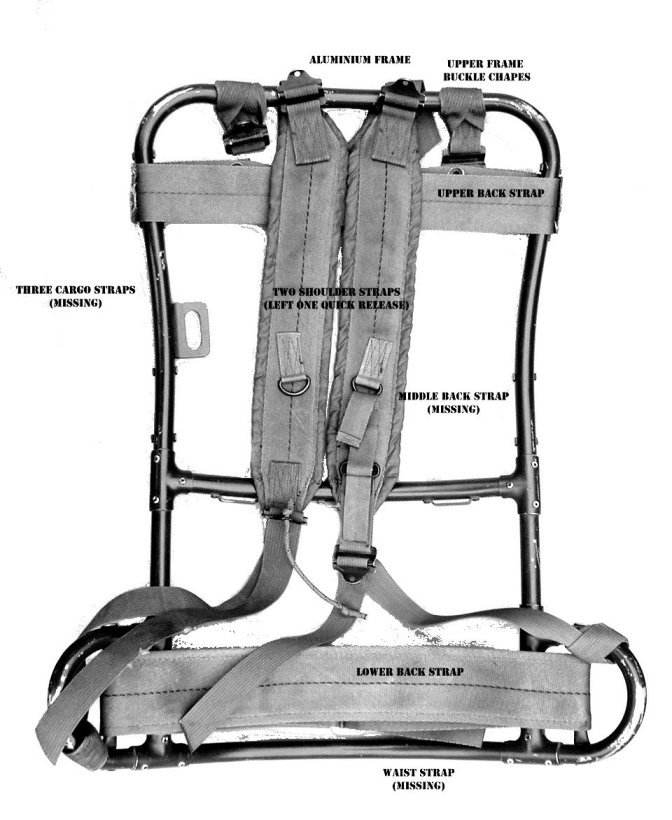

Aluminium
Frame
Two Shoulder Straps (Left one quick
release)
Upper Back
Strap
Middle Back Strap (Early models do not have the middle horizontal
strap)*
Lower Back
Strap
Waist
Strap
Two
Vertical Cargo Straps
*Note that in the picture above the frame is equiped to use a middle back strap, the small metal tabs to retain the strap in place are present on the frame, but the strap is not mounted.


Left shoulder strap


Right shoulder strap with quick release
You should have two shoulder straps similar to the ones pictured above. The left shoulder strap has a quick release device, whilst the right strap does not.


At the bottom end of either straps is a loop. Thread this around the outer bar of the frame and then around the strap itself. Then pull until it tightens itself.

At the top of the frame are four frame loops.
The outer two are for the vertical cargo straps and the inner two are for
attaching the rucksack shoulder straps.
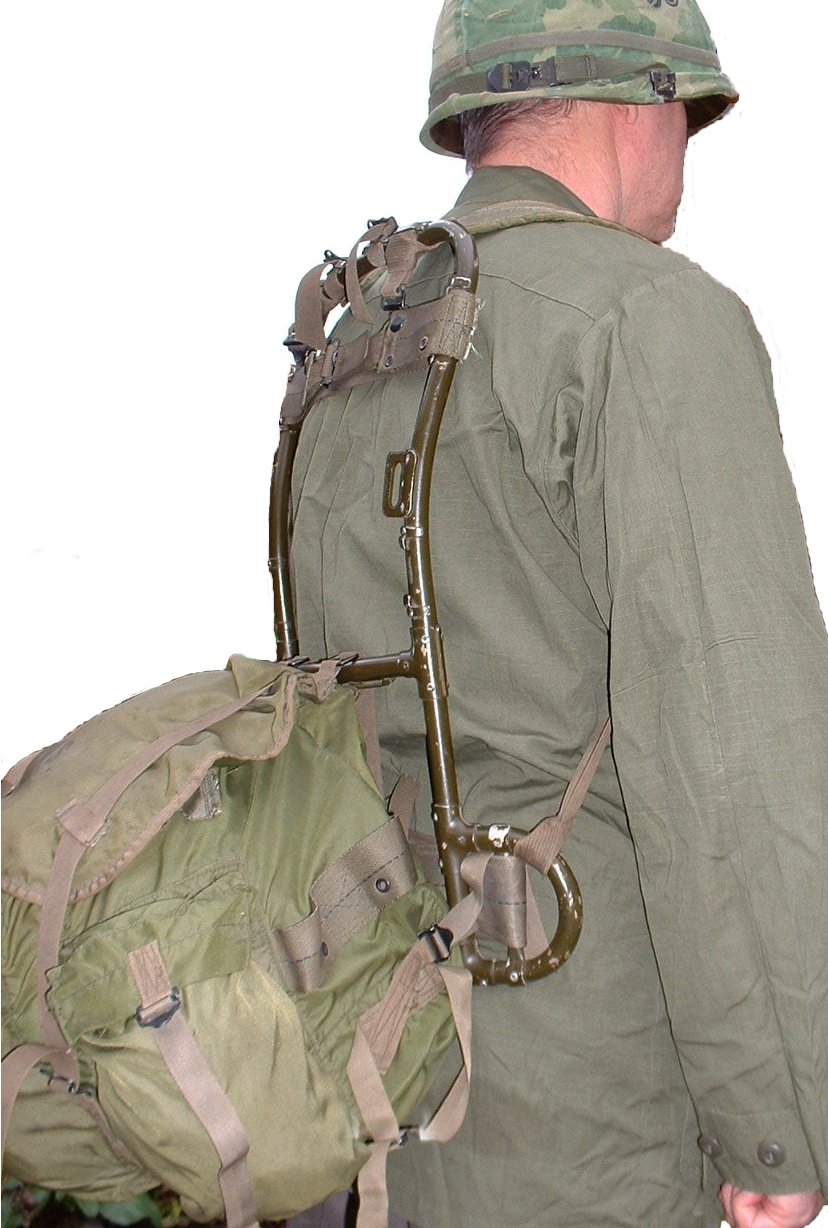
Face the frame so that the curved
side, i.e. the side that goes against your back, is towards youself.
Thread the upper shoulder strap around the outside of the upper bar of the frame
and through the inner riveted loop. Secure it through the shoulders
strap's buckle. Adjust to fit.


Face the frame so that the shoulder straps are away from you. The upper back strap is secured between the two riveted clips visible in the picture above. Thread the strap between two aligning placements, so that the buckle is towards you. Thread the one end through the clip and secure. Secure the extra webbing flap by fastening the snaps.


The lower back strap is arranged around the rucksack frame as pictured above. Face the rucksack so that the curved side is away from yourself. Wrap the strap around the frame and secure with the buckle. Adjust to fit. To attach the waist strap (Not pictured) secure both ends in a similar way to the shoulder straps on the same frame part as the lower back strap. Adjust to fit.

To assemble the vertical cargo straps first attach the upper frame buckle chapes through the two outer loops, remember the inner two loops are for the shoulder straps. While facing the curved side away from you, thead the looped end of the chape through the buckle and round the upper frame bar. Loop over the other end and pull tight. The cargo straps attach in the same way to the buckles on the middle frame bar. The cargo straps are pulled upwards to secure on the chapes own buckles.
Pouch Flap (With Map Compartment)
Nylon
Drawstring
Three Cargo Pockets
2 Hangers A & B
Frame Securing
Strap
Canteen Securing Strap
Pouch Reinforcement Straps
The Lightweight tropical rucksack is attached to the frame on the lower bars. The lower position is the standard, but can also be attached to the frame in an 'Upper Position'. If you havent done this before it can be quite tricky.

If you have the back of the rucksack facing you you will see two straps and buckles like those in the above picture.

Put the rucksack down with these straps facing towards you. Then place the rucksack frame on top. The curved section is towards you with the middle frame bar positioned as in the photograph.


Place the two straps between the three cargo buckles. Loop one of the straps through its own buckle and back on itself. Repeat with the other strap.


Next secure the sides of the rucksack to the frame using the frame securing straps. The result looks like below......

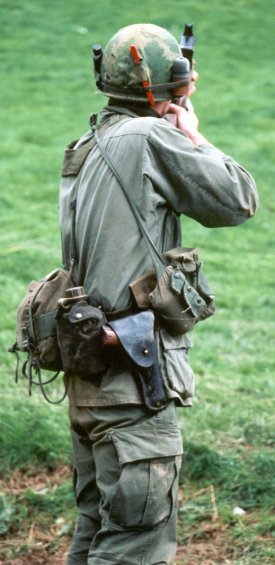
Compass pouch
The
compass pouch
under the standard ILCE system is normally secured on the pistol belt to the
front or on the side of the right ammo pouch. The single clip on the back allows
it to be secured almost anywhere. In Vietnam it was often positioned on the left
suspender webbing attachment. Try it on the buttpack or even the helmet band.
There is no reason why you cannot have several compass pouches on your webbing,
since it can carry a compass, bandage and is just the right size for a 20 round
magazine. This Air Cavarly re-enactor (Pictured below) wears the standard
'System' with the compass pouch on the left shoulder away from the side he would
fire from. Notice his empty bandolier, characteristic of a recent battle.

Most Vietnam re-enactors carry
at least 2 canteens on their webbing. Where you attach it is down to personal
choice. I secure mine either side of my lightweight tropical rucksack,
hooked on with the ALICE clips and secured from flapping by the straps attached
at that point on the ruck. The other common position is directly on
side webbing of the buttpack or on the web belt on either side of the butt pack. If
you carry more than two they can be positioned all around the
pistol belt, even replacing the ammo pouches or on buttpack carrying handle.
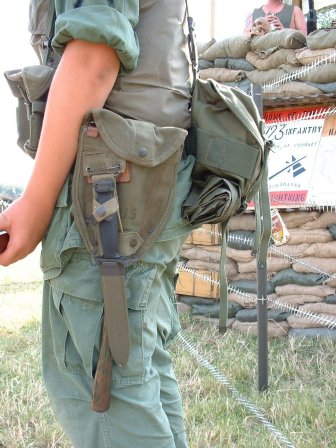
The alternative to carrying several canteens is using a 2 qt collapsible
instead. You can carry the same amount of water taking up less space,
and it allows for more equipment. The trooper in the picture below is carrying
2, 1QT canteens on the rear of his pistol belt next to a M1956 ammo pouch.
He also has a jungle first aid kit attached high up on his
suspenders.

Ammo pouches are
positioned on front by most re-enactors, some carry up to 4. I have two on my
web belt carried front on left and right sides. This makes for some
comfort when you are firing from the prone position. In light combat
conditions you could do away with the buttpack and position one between your two
canteens or around on the hips.


You should have the following helmet components.


Ahhhh, what can you say....FREE cigarettes in every
C-Ration box. Great for the nerves, bad for the lungs, a must have
item. A small pack of cigarettes that came with the C-Ration accesory
packet. It contains 4 cigarettes. There is a choice of packs e.g. PalMal,
Marlboro, Winstons, Bensons & Hedges, Newport.
Not a hard to find
item. It gives your helmet that recognisable 'Nam look'. DO NOT TRY
TO SMOKE THEM! If you want to smoke, don't waste these little jewels, go
to a smoke shop or flea market, pick up one of those metal cases that are just
the size of a pack of cigarettes. Stick you current smokes in the case to
hide the new wrapper. The more beat up the case the better.

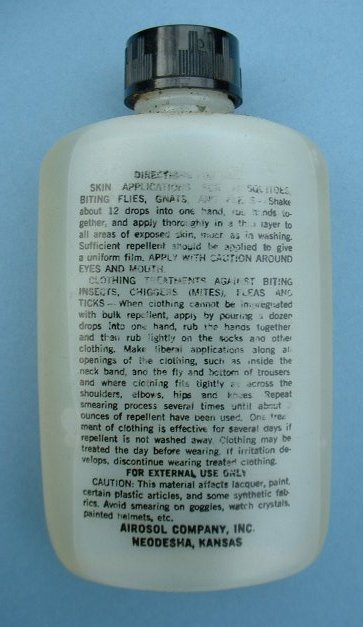

A small plastic bottle with screw lid containing sweet smelling liquid to keep the flies away. Sweet smelling....are you shitting me! There are three varieties that I know of: (1) clear bottle with paper label, (2) clear bottle with printing directly on the bottle and (3) green bottle also with printing directly on the bottle. I used to put this stuff in my Zippo and it burned just fine!

A white plastic spoon that came with the C-Rations accessory pack. Don't think that any old white spoon will do, it will not. The Vets can spot them!


A small metal device for opening cans. When soldiers had C-rations, the P-38 was your access to food, that made it a high priority. Soldiers discovered the tool acquired its name from the 38 punctures required to open a C-ration can, and from the boast that it performed with the speed of the World War II P-38 fighter plane. Never in its 52-year history has it been known to break, rust, need sharpening or polishing. The P-38 was an extremely simple, lightweight, multipurpose tool. In warfare, the simpler something is and the easier access it has, the more you're going to use it. The P-38 had all of those things going for it. The P-38 is one of those tools you keep and never want to get rid of because you can use it as a screwdriver, knife, anything. Perhaps that is why many soldiers, past and present, regard the P-38 C-ration can opener as the Army's best invention. I still have mine!!

A plastic bottle containing LSA gun oil. (Light Small Arms). Sometimes seen in the helmets.

A cardboard packet of damp resistant matches that comes with the C-Rations accessory packet. Nice to have but damp resistant is a relative term. Usually mush and useless if there is any sort of moisture in the air.

A small first aid packet sealed in plastic wrapping containing a sterilised cotton gauze. Normally kept in the Compass Pouch, but also seen kept in the helmet band, especially by Medics. Be sure to keep an eye out for dates on these packets. A lot of them around the market place and dates range from the 60's to current dates. Details are where it counts.
Toilet Paper, Death Cards, the chewing gum from C-rat packs, other personal items. Be careful not to get carried away.
![]() This
Web Page Created with PageBreeze
Free Website
Builder
This
Web Page Created with PageBreeze
Free Website
Builder
![]()